
A Tasty Holiday Treat
When family and friends come together in celebration of the holiday season, tasty treats are a must-have for the festivities. You can also celebrate the season of giving with a special giveaway at the end of your gathering to show your gratitude to loved ones. (Family Features)
A simple yet delicious treat, Chocolate Bacon Bark is a sweet-and-salty snack with Gwaltney Bacon as the centerpiece of a crowd-pleaser for nearly any celebration. Try pairing with these creative giveaway bags as a personalized memento to offer a unique memory even after the season comes to a close. The bite-sized morsels are also perfect for individual grab bags by the door as guests make their way home following holiday celebrations.
Visit gwaltneyfoods.com for more holiday recipe ideas.
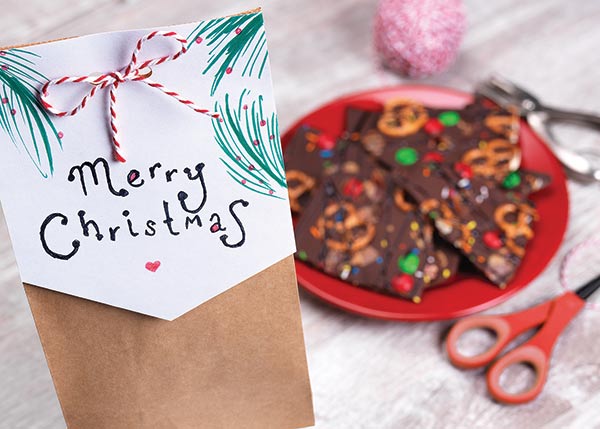
Chocolate Bacon Bark and Giveaway Bags
Prep time: 10 minutes
Servings: 24
Chocolate Bacon Bark:
- 1 bag (12 ounces) chocolate candy melts
- 1 package (12 ounces) Gwaltney Bacon
- toppings such as pretzels, candies and sprinkles (optional)
Giveaway Bags:
- Scissors
- Card stock or construction paper
- 24 brown paper lunch bags
- Coloring or drawing materials
- Hole puncher
- Ribbon
- To make Chocolate Bacon Bark: Line baking sheet with parchment paper. In bowl, melt chocolate candy in microwave in 30-second increments; stir every 30 seconds.
- Pour chocolate into pan and spread evenly.
- Top with bacon and pretzels, candies and sprinkles, if desired; freeze until hardened (about 12 hours).
- Break into bite-sized pieces.
- To make Giveaway Bags: Using scissors, cut one piece of card stock or construction paper to match width of paper bag.
- Cut length of card stock or construction paper into “V” shape so point comes about 3/4 down bag.
- Decorate card stock or construction paper with sayings or drawings.
- Stuff paper bag with Chocolate Bacon Bark.
- Hold decorated card stock or construction paper to top of paper bag, “V” shape pointed down, and punch two centered holes about 1/2 inch from top and 1/2 inch away from each other.
- Using scissors, cut one piece of ribbon about 6 inches long.
- With holes aligned and decorated card stock or construction paper facing out, insert end of ribbon from back side of bag; tie loose enough knot or bow so paper bag doesn’t rip.
- Repeat process with remaining bags.
SOURCE:
Gwaltney
SurBroadcast – Exclusive Domain Names


